
Tracking Changes in Open Source Libraries on Github
There are two ways to consume open source libraries. The first is for situations where you want to specify a fixed, specific version, and move that version forwards (to gain access to new features or bugfixes) or perhaps backwards (to side-step regressions or incompatible changes). This situation is common when developing end-user applications and is optimised for predictability.
The second situation is when you want to specify a range of compatible versions, and let a package management solution decide which of those versions is the most optimal (by perhaps sharing a version already available). This situation is common when developing libraries that depend on others, which sit between an end-user application and the open source libraries and is optimised for maximum support.
Moving between versions: Upgrading an open source library
In this situation, you’re starting for an existing reference point (you’ve already added an earlier version of the library to your application) and you’re interested in only the information that will get you from one fixed point to another.
Check the changelog
If you’re lucky, the maintainers of the library in question will diligently and accurately maintain a changelog, detailing the changes with each version.
Sometimes this is a separate file you can find in the root of the repository (or use the search feature to locate):
It may also feature as a section of the Readme file (use the browser’s in-page search feature to quickly find references to one).
And sometimes a changelog is maintained as a series of release notes, which you can get to from the right-hand sidebar, with the current Github layout:
Finally, sometimes the changelog and/or release notes are maintained on a separate webpage. Search the Readme, look at the Google results for the package, and check the metadata (e.g. package.json, gemspec etc) for any reference of a separate homepage for the library.
Diff the Readme
Not all open source projects maintain changelogs or release notes and even those that do, are rarely written at the level of specificity needed to quickly determine if the reader’s application is affected or not.
A neat trick to quickly establish only what may have changed in terms of external behaviour is to diff the changes in the Readme file between the versions you’re interested in. You can do so by navigating to the /compare path:
1
| |
There you can select two tags or branches to compare. Select the earlier/lower tag from the first dropdown (this is the version you are currently on), and the version you are wanting to upgrade to from the second dropdown.

Once the diff has been generated, select the Files Changed tab, scroll down tho the Readme File (the browser in-page search can be useful here for larger diffs) and click the button with a folded down page icon (which has a alt text of Display the rich diff).

This will show you in a concise, highly readable manner what changes were made to the Readme between the versions you’re interested in. This is often the best way to quickly determine major changes of the library, and works best for libraries that document the majority of their functionality in the Readme (rather than in wikis or separate webpages).
Determining which version to upgrade to
Sometimes you’re going through routine maintenance and upgrading the dependencies of your application and the question of which version to upgrade to is clear (the latest). But other times you have a particular bugfix or feature that you need from a library, and don’t want to upgrade any further than you have to (to reduce the risk and number of changes to grapple with).
Working from a Github issue or pull request
This situation can occur when you encounter an error or problem, and after Googling it, you arrive at a closed issue on Github with a referenced pull request or commit as reportedly being the solution or resolution, but without any clear indication of what version you’d need to upgrade to, to get the fix.
Click on the commit link (or the merge commit in the case of a pull request) and you’ll be taken to another page to view all the changes in that commit. At the top of this page is a widget that shows the branch this commit exists on, and the range of subsequent tags that include it.

The lowest (left-most) tag is the first version that included this commit (which doesn’t rule out the possibility of future regressions, but should be a good starting point for where you need to upgrade to, to get the fix or feature). For commits that are only in one tag, you will only see that tag, and not a range.
In the case of severe security hotfixes, it’s possible the library maintainers have also back-ported to fix to older versions of the library. So double check the release notes to ensure there isn’t a smaller upgrade path available to you.
If there is no tag widget at all, it means the commit has not yet been tagged or released, and you will likely have to consume the head of development (in whatever form that takes for your particular language and package management solution).
Working from changes in the Readme
Something that may also occur is you’ve read about a feature in the library’s latest Readme file, that you’re sure wasn’t available the last time you used the library (or when you tried to use it, you got an exception that clearly indicated the feature was not available in the version you were using).
You have a few options to determine exactly when that feature was introduced:
- Check the library’s changelog and search for references to it (described above)
- Open the Readme file from the file selector (don’t just view it as the default page of the repository) and click the Blame button, to find in what commit the new lines in the Readme were added, which you can then use to find out what version the feature was first documented (described in more detail below).
Determining compatible versions of open source libraries
When authoring open source libraries that depend on others, it’s often required you declare what versions of those dependencies are compatible with your own, to allow package management systems to resolve suitable versions. This is essentially a question of what library versions provide the inputs, outputs and side-effects your code expects.
When upgrading an open source library, you are working forwards, jumping between two specific points (i.e. it doesn’t matter if a bug was introduced and subsequently fixed - it only matters how the library behaves in the version you’re upgrading to). However, determining compatible versions of a library usually involves working backwards from the version you initially developed against, and deals with ranges of compatible versions (so if a bug, vulnerability, or regression is introduced in a particular release, you may need to exclude it).
Check the changelog and diff the readme
Once again, checking the changelog and diffing the readme of the library can be useful information. However, often you’re only using a subset of the library’s functionality and the whole changelog can be a lot to read through and decipher. You may also be integrating with a library in a way that goes beyond the public interface (which of course is not recommended, but sometimes required) and you need a better insight into when the internals have changed.
Line and file changes
First, audit your code to get a list of classes, constants, methods, etc your code relies on from the library. You’re attempting to clarify the ways in which your library depends on the behaviour of the open source one.
Next, you need to establish where each of those is defined in the open source library. Modern IDEs may be able to help point you to the right file before you switch to Github. Alternatively, you can use the Search or jump to… input in the top left-hand corner to search the repository.

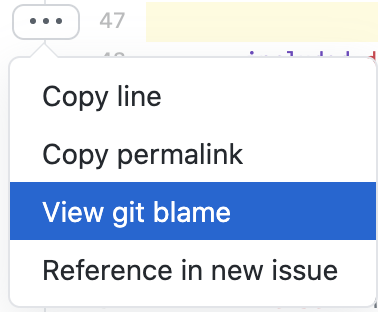
Once you’ve located the file, and the place within it where the method, class, etc is defined, click on the line number, and then the ellipses button. Select View git blame from the the context menu that appears.
This will add an extra column next to each line, with the commit and author details of the last time that line was changed (if you’re not currently viewing the latest version of the file, it was the last time that line was changed before that version of the file).
By clicking on the commit message, you’re taken to another page to view all the changes in that commit which includes the widget for determining the range of subsequent tags that include it.
This is effectively how long that line has been the version you were viewing. If the final tag is the latest released version, the line is still as you’ve seen (and presumably the version of the code you had in mind when writing your own library).
If you’re lucky, most or all of the method’s definition will have been last modified in the same commit. However, often a method will have been updated over time and you’ll need to track each change and whether it makes a difference for how your code is using the library. Just because a method or class has changed, it does not necessarily mean a difference for your library (addressing linting, refactoring, or adding extra backwards compatible options, for example). You should be going back as many versions of the code module as you can, until it either doesn’t exist, isn’t exported or made available, or changes in such a way that the behaviour is no longer what your library requires.
Sometimes it useful to be able to see the previous commits of a line by using the View blame prior to this change button:

If the changes are large or complex enough, it’s usually easier to treat the file as a whole and view the history of changes to it by clicking the History button at the top of the page:

This allows you to view in what commits a file changed, what those changes were, and then (using the widget described above) what published versions of the library used that version of the file. Be careful to look at the most recent commit that was in each version. If a file changed twice between two versions, the commit for both versions will appear as if they were in that version. (You may wish to check the version of the file is the one you’re expecting by viewing the tag - more on that next).
Tags and branches
Presuming the maintainers of the library have been reliably and accurately tagging the repository with version tags that match the published versions of the library, viewing the code by tag can also be a useful tool. Although this is the feature that most closely resembles what we’re looking for (published versions of the code), it is often more helpful to start with the commit history of lines or files, as described above, because they only mention when the code changes; often the code you’re interested in will not change between tags. For the best results, use a combination of the two, to get a complete picture.
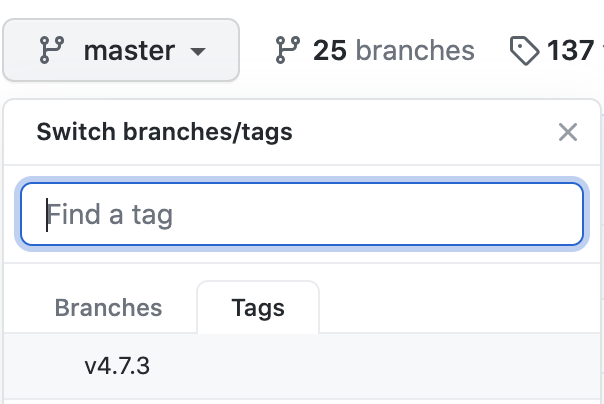
At the root of the repository, Github provides the ability to checkout the repository as it exists on a particular branch or tag:
Once you’ve selected your tag (i.e. version), you will need to navigate to the file(s) you’re interested in and you will see it as it exists in that version of the library.
Other techniques
A discussion of actively testing your library against all or landmark versions of its dependencies is outside the scope of this article, but it is advised to pair active testing with the techniques listed here.